Fonolo’s Responsive Web Rescue Widgets allow customers to navigate through a visual IVR and directly request a call-back. With just a few lines of code added to your website, you can enable the Client to seamlessly transition from web to live assistance. This also gives you the ability to offer them a Scheduled Call-Back at a later time, helping you to smooth out spikes in call volume.
For more information about Fonolo’s new Responsive Web Widget please visit NEW! About Fonolo’s Responsive Call-Back Widget
This guide will outline the customization options that are available for configuring the customer’s experience of a Responsive Widget.
Methods of Customization of the Responsive Web Rescue Widget
The Responsive Web Widget interface can be configured in two ways:
- Back-End Configuration using the Fonolo Portal
The back-end configuration, which can adjust the appearance and content of the Responsive Widget, can be configured in the Fonolo Portal. For more information on back-end configuration of the widget using the Fonolo Portal please visit How to Create and Customize a Responsive Web/Mobile Rescue Widget - Front-End Configuration using CSS and JavaScript loader options
JavaScript styling options can be configured by including arguments for our “fonolo” function in the script that is added in the header of the website code for where the widget will be placed. These arguments affect the “container” and “iframe” objects in which the Responsive Web Widget loads on the page. Regular CSS styling rules can also be applied to the elements.
Front-End JavaScript loader options
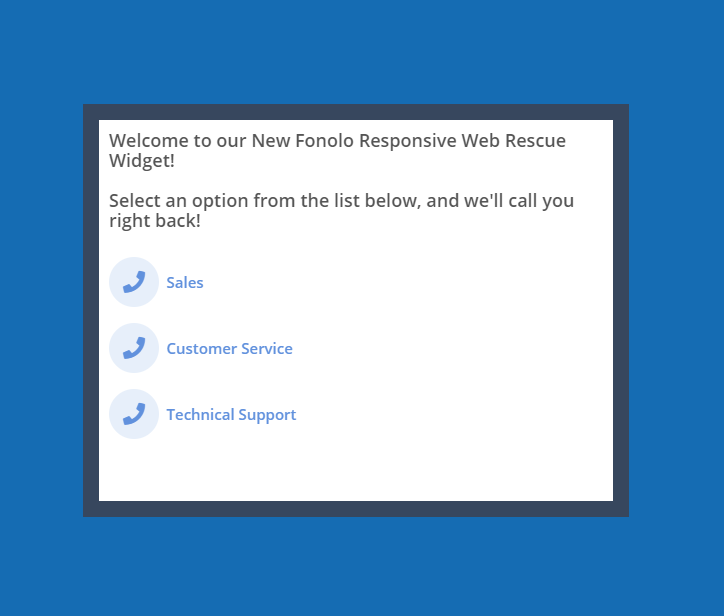
The Responsive Widget loads as a button in the bottom right of the page. When clicked, the pane slides up and displays the queues  available to the user to initiate a call-back. The responsive design uses both an iframe object and div container object that can have CSS styling rules assigned to them.
For more information on how deploy the Responsive Web Rescue Widget. Please visit Placing the Widget on a Webpage
The Default Script and Configurable Arguments
The following is the default script tag that must be added to the head of your page for the widget to load:
<script async src="https://platform.fonolo.com/v2"></script>
<script>
    window.fopts = window.fopts || []; function fonolo() { window.fopts.push(arguments); }
    fonolo("<Profile SID>");
</script>
This is the minimum information that is required to successfully deploy the widget.
Configurable Arguments
For further front-end styling customization, the following default options can be configured as the second argument in the “fonolo” function:
defaults: {
    container: '_fc_widget_container',
    input: {},
    containerStyle: null,
    containerClass: null,
    iframeStyle: { border: 'none', display: 'block', height: '100%', margin: '0px', padding: '0px', width: '100%' },
    iframeClass: null,
    displayWarnings: true
}
The following is a short description for each of the arguments that can be used to adjust the front-end loader options for the widget:
• container is the DOM id of the container that the whole widget sits in. This is the frame that pops up when the button is clicked to open the widget. By specifying this attribute, the widget will be loaded as an embedded object in the container.
• input – this is a sub-object that lets default values of input fields to be passed in.
• containerStyle – specifying this argument allows the application of styles to the container div element directly;
• containerClass – specifying this argument allows the application of a CSS class to the container div element.
• iframeStyle – specifying this argument allows the application of styles to the iframe element that sits inside of the container div.
• iframeClass – specifying this argument allows the application of a CSS class to the iframe element that sits inside of the container div.
• displayWarnings – this is a true/false setting- if set to true, then any warnings that occur when the widget is loaded will be logged to the JavaScript console.
Customization Examples
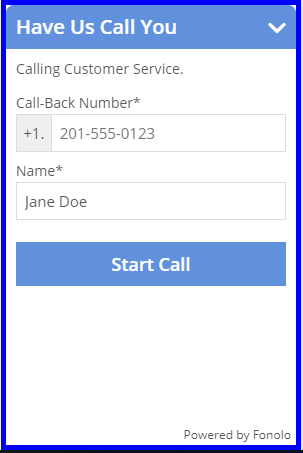
Pass a default name

<script async src="https://platform.fonolo.com/v2"></script>
<script>
    window.fopts = window.fopts || []; function fonolo() { window.fopts.push(arguments); }
    fonolo("<Profile SID>",
    {
        input: {
            name: "Jane Doe"
        }
    });
</script>
Define a Pre-Selected Option
Along with passing a default name, the Responsive Widget can be configured to automatically open on a pre-selected call-back option when the button is clicked. This can be useful for being able to customize how the Widget functions, and different options can be automatically loaded on different pages. A Pre-Selected Option must be created in the Pre-Call Questions section of the Call-Back Profile settings of the Responsive Widget in the Fonolo Portal. For more information about this please visit How to Configure a Call-Back Profile > Pre-Call Questions
The ‘option’ attribute can be defined in the following code:
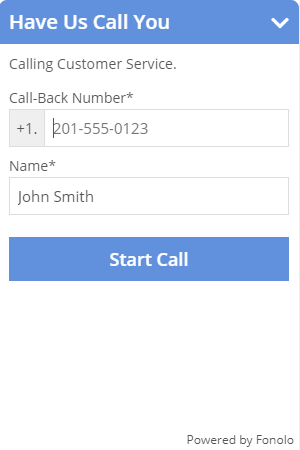
<script async src="https://platform.fonolo.com/v2"></script>
<script>
    window.fopts = window.fopts || []; function fonolo() { window.fopts.push(arguments); }
    fonolo("CP5af9c611ed4ec827cfad292f34fa0dca",
    {
        input: {

            name: "John Smith",
            option: 2
        }
    });
</script>
Using CSS Tags with the containerStyle Object
<script async src="https://platform.fonolo.com/v2"></script>
<script>
    window.fopts = window.fopts || []; function fonolo() { window.fopts.push(arguments); }
    fonolo("<Profile SID>",
    {
        containerStyle: {
            border: "solid 5px blue"
        },
        input: {
            name: "Jane Doe",
            option: 2
        }
    });
</script>
Customizing the iframeStyle Argument

<script async src="https://platform.fonolo.com/v2"></script>
<script>
    window.fopts = window.fopts || []; function fonolo() { window.fopts.push(arguments); }
    fonolo("<Profile SID>",
    {
        containerStyle: {
            border: "solid 5px blue"
        },
        iframeStyle: {
            border: "solid 5px yellow"
        },
        input: {
            name: "John Smith",
            option: 2
        }
    });
</script>
Using CSS Classes
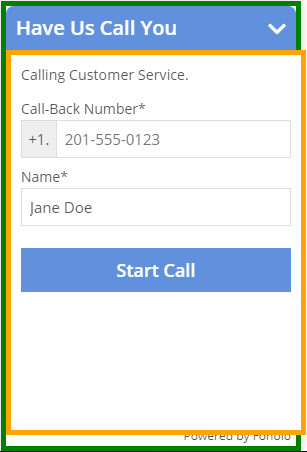
<style>
    .my_container_style {
        border: solid 5px green !important;
    }
    .my_iframe_style {
        border: solid 5px orange !important;
    }
</style>

<script async src="https://platform.fonolo.com/v2"></script>
<script>
    window.fopts = window.fopts || []; function fonolo() { window.fopts.push(arguments); }
    fonolo("<Profile SID>",
    {
        containerClass: "my_container_style",
        iframeClass: "my_iframe_style",
        input: {
            name: "Jane Doe",
            option: 2
        }
    });
</script>
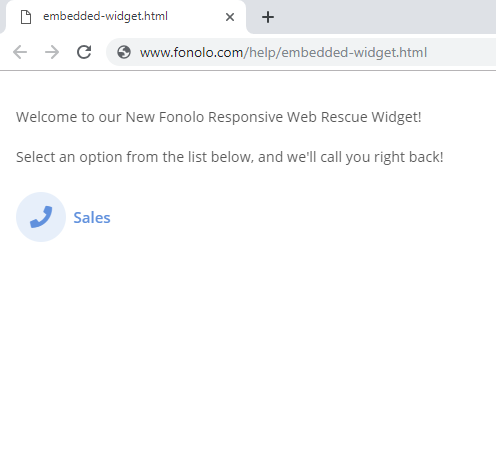
Embedding a Widget
Instead of the Responsive Widget loading from the pop up button, it can be embedded into the web page by specifying a container, the location of which, can be customized according to the design of the site.
Below is one of the ways to embed the Responsive widget into a web page.
<!DOCTYPE html>
<html lang="en">
    <head>

        <script async src="https://platform.fonolo.com/v2"></script>
        <script>
            window.fopts = window.fopts || []; function fonolo() { window.fopts.push(arguments); }
            fonolo("<Profile SID>",
            {
                container: "custom_location"
            });
        </script>

</head>
    <div id="custom_location"></div>

<body>
</body>
</html>
Customizing the Container for the Embedded Widget
The container for the embedded widget can be customized using the standard methods of styling in HTML 5. In this case we have styled the container using the style tags in the head of the HTML code. This can now be treated as any other container.
<!DOCTYPE html>
<html lang="en">
    <head>

        <style>
            #custom_location {
                padding: 1em;
                background: rgb(55,71,94);
                height: 40%;
                width: 27%;
                margin-left: auto;
                margin-right: auto;
                margin-top: 200px;
            }
        </style>

        <script async src="https://platform.fonolo.com/v2"></script>
        <script>
            window.fopts = window.fopts || []; function fonolo() { window.fopts.push(arguments); }
            fonolo("<Profile SID>",
            {
            container: "custom_location"
            });
        </script>

    </head>

        <div id="custom_location"></div>

<body bgcolor="#156CB3">
</body>
</html>
Modal Example
Here is an example of loading the Fonolo widget in a modal window.

<!DOCTYPE html>
<html lang="en">
    <head>
        <script>
            window.fopts = window.fopts || []; function fonolo() {window.fopts.push(arguments); }
            fonolo("<Profile SID>",
            {
            container: "fonolo_widget",
                input: {
                name: "Test User",
                account: 12345
                }
            });
        </script>
        <script> async src="https://platform.fonolo.com/v2"></script>
        <script>
            window.onload = function()
            {
                document.getElementById("trigger").onclick = function()
                {
                    document.getElementById("overlay").style.display = "block";
                    document.getElementById("modal").style.display = "flex";
                }
                document.getElementById("close").onclick = function()
                {
                    document.getElementById("modal").style.display = "none";
                    document.getElementById("overlay").style.display = "none";
                    return false;
                }
            }
        </script>
        <style>
            #modal {
	            display: none;
	            position: absolute;
	            top: 20px;
	            right: calc(50% - (250px / 2));
	            width: 300px;
	            height: 400px;
	            flex-direction: column;
            z-index: 10;
            }
            #overlay {
                display: none;
                overflow: hidden;
                position: absolute;
                left: 0px;
                top: 0px;
                width: 100%;
                height: 100%;
                z-index: 5;
                background-color: rgba(0,0,0,0.2);
            }
            #fonolo_widget {
                width: 100%;
                height: 100%;
                box-shadow: 0 4px 8px rgba(0,0,0,0.2);
            }
            #close {
                text-align: right;
                margin-right: 4px;
                margin-bottom: 4px;
            }
        </style>
</head>
<body>
    <button id="trigger">Open Widget</button>
    <div id="modal">
        <a href="#" id="close">Close</a>
        <dive id="fonolo_widget"></div>
    </div>
    <div id="overlay"></div>
</body>
</html>