Fonolo’s Responsive Web Rescue  Widgets allow customers to navigate through a visual IVR and directly request a call-back. With just a few lines of code added to your website, you can enable the Client to seamlessly transition from web to live assistance. This also gives you the ability to offer them a Scheduled Call-Back at a later time, helping you to smooth out spikes in call volume.
After starting a call-back request, Clients can watch the progress through the widget so they know when to expect the call back. They’ll see status messages like “Calling Company”, or “Waiting on Hold”. You can also include Pre-Call questions that will request information from your Client, and pass it to your agents to improve their efficiency.
Generating the Widget
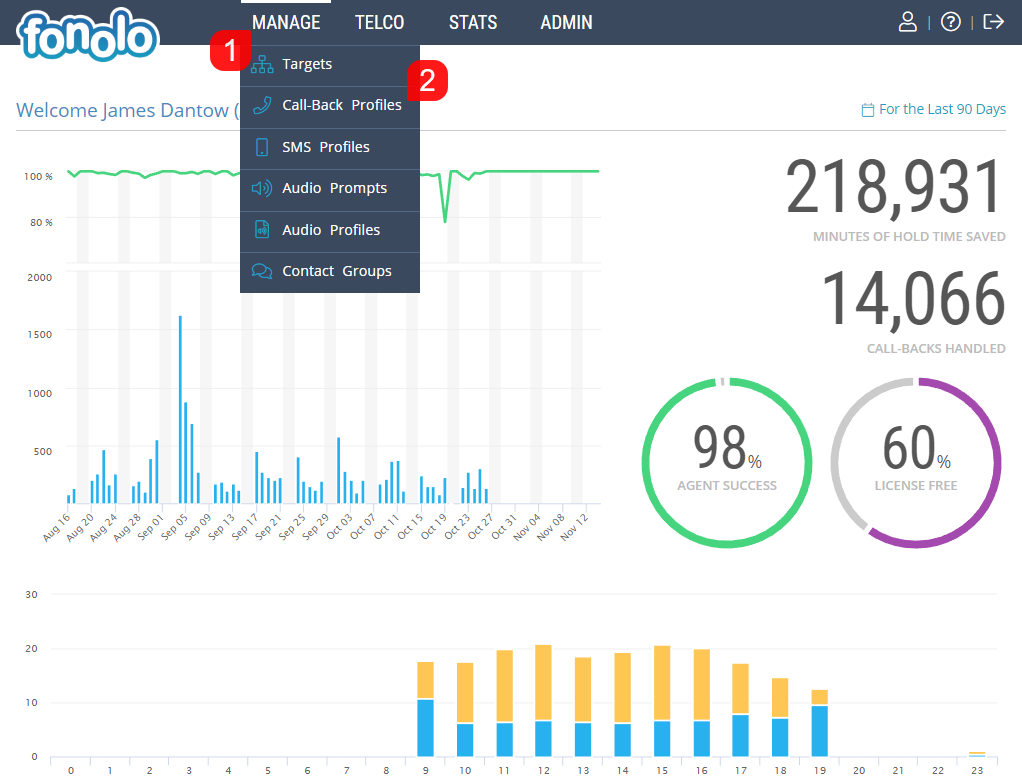
To create a new Web Rescue Widget, start by going to MANAGE (1) > Call-Back Profiles (2).
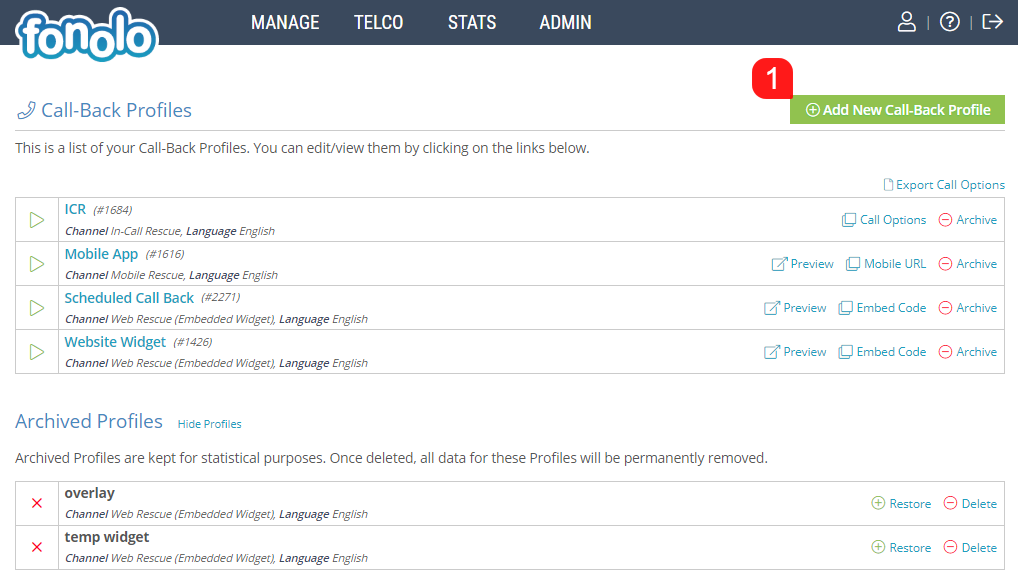
Then click on the green ‘Add New Profile’ button (1) in the top right corner of the page to begin creating your widget.
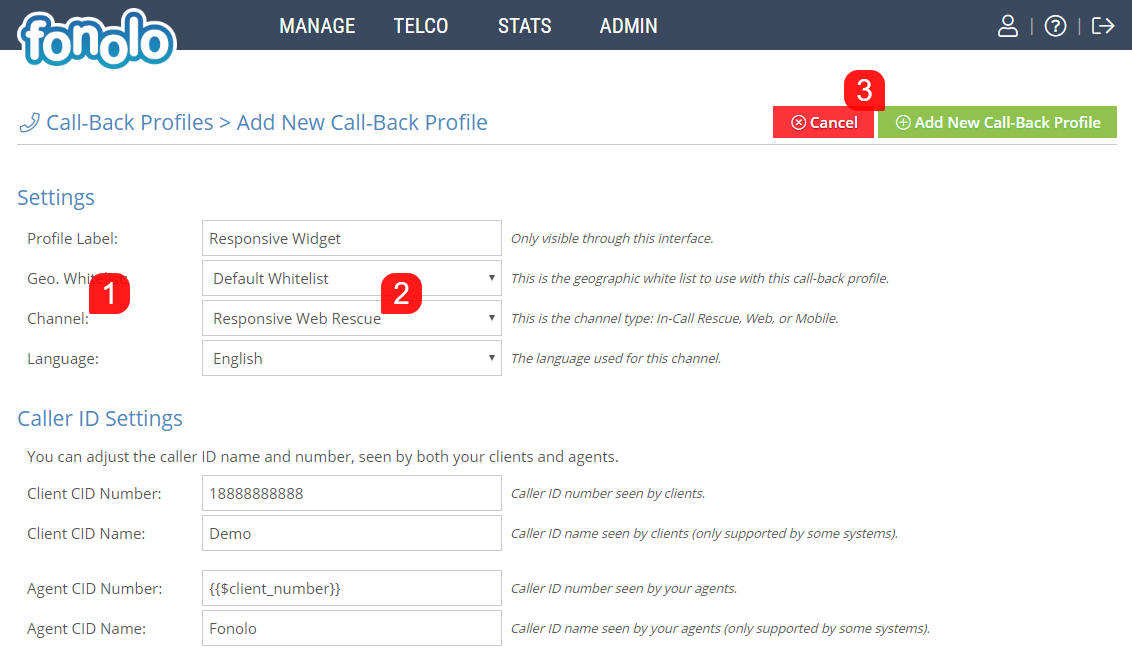
The initial settings (Call Options, Telco Settings, etc.) for creating a web widget are the same as for creating a regular Call-Back Profile. To create a web widget, however, you will select the ‘Channel’ (1), and then select ‘Responsive Web Rescue’ (2), as per the screenshot below. Then click the green ‘Add New Call-back Profile’ button (3) in the top right corner of the page.
Appearance
One of the major differences of the Responsive Web Widget is the ability to customize the appearance directly from within the Fonolo Portal, and have the changes to your live widget take effect in real time. This can be accomplished by visiting the Appearance tab (1) at the top of the page. Each different customizable component of the Responsive Web Widget can be accessed by clicking any of the blue headings (2) that separate out the different options. Once a particular heading is selected, the various appearance customization options will appear in the space below. Aspects you can customize include font size, color and type, as well as the direction of text and different spacing options. You can also customize the way the widget is shaped, and change the overall styles of the widget and button. Any changes made will be reflected to the right in the “demo widget” (4) that gives a visual representation of the customizations you have selected.
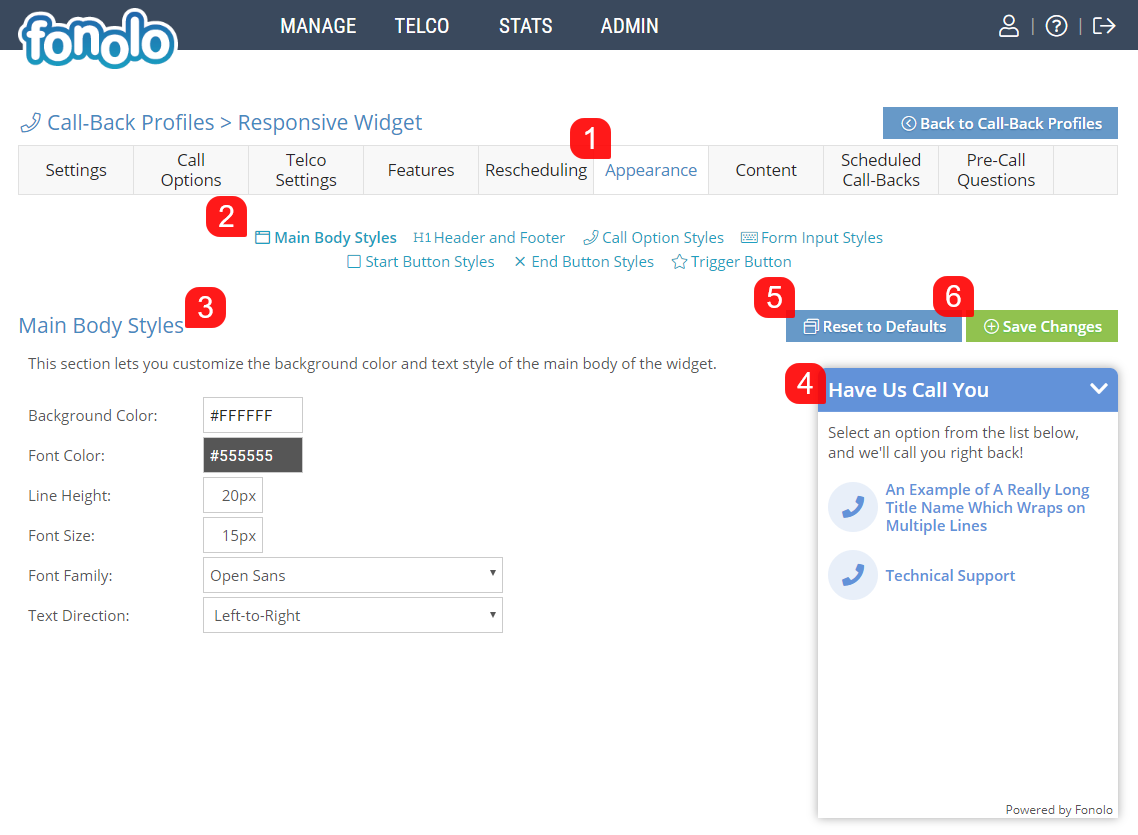
Any changes made can be reverted using the ‘Reset to Defaults’ button (5).
Once all desired Appearance changes have been made, click the green ‘Save Changes’ button (6) to save your work.
Content
The Content tab (1), as pictured below, allows you to customize the actual verbiage used in each part of the widget. The blue headings (2) across the top break into different sections the different pages and steps that the user would navigate across when signing up for a call-back. For each blue heading that is selected, all customizable labels and texts are displayed below (3) and are updated live on the demo widget on the right hand side of the screen (4).
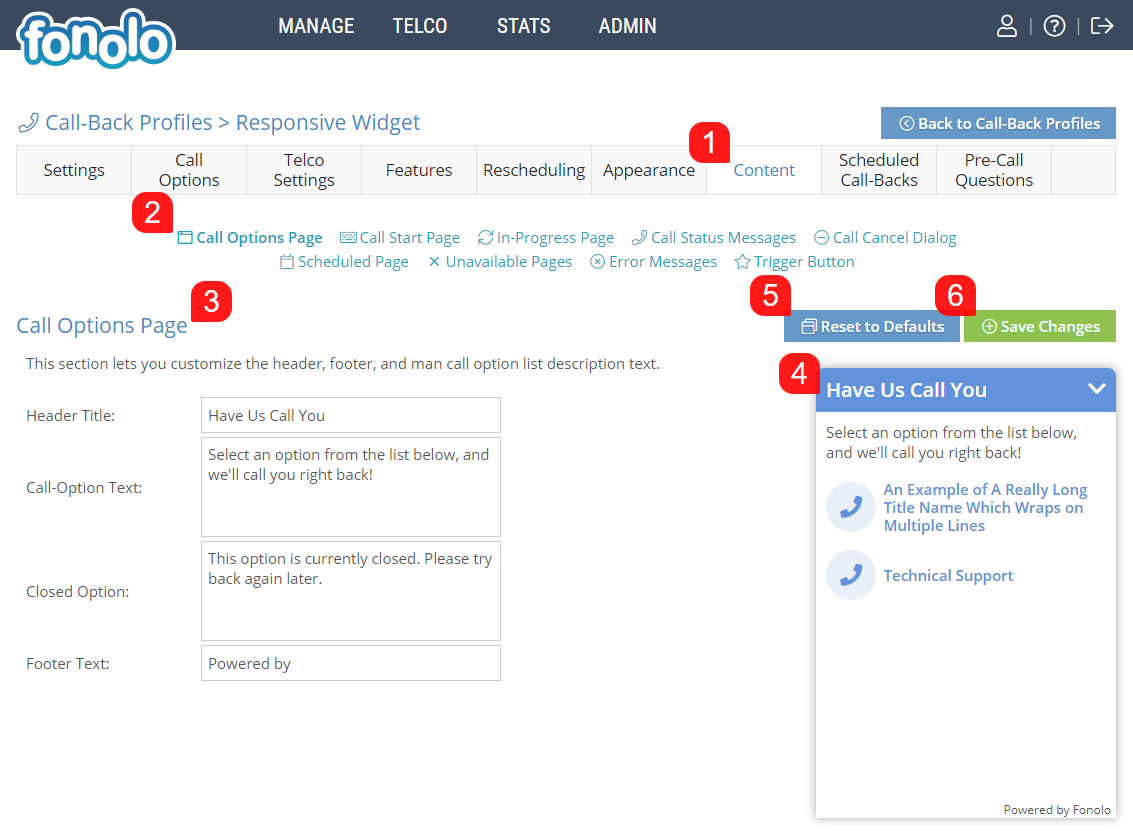
Any changes made can be reverted using the ‘Reset to Defaults’ button (5).
Once all desired Content changes have been made, click the green ‘Save Changes’ button (6) to save your work.
Placing the Widget on a Webpage
There are two ways to place the responsive widget on a web page. The first option is to place a Javascipt tag into the header section of the webpage (1). This creates a small button that floats in the bottom-right corner of the screen, allowing the user to click it to bring up the widget.
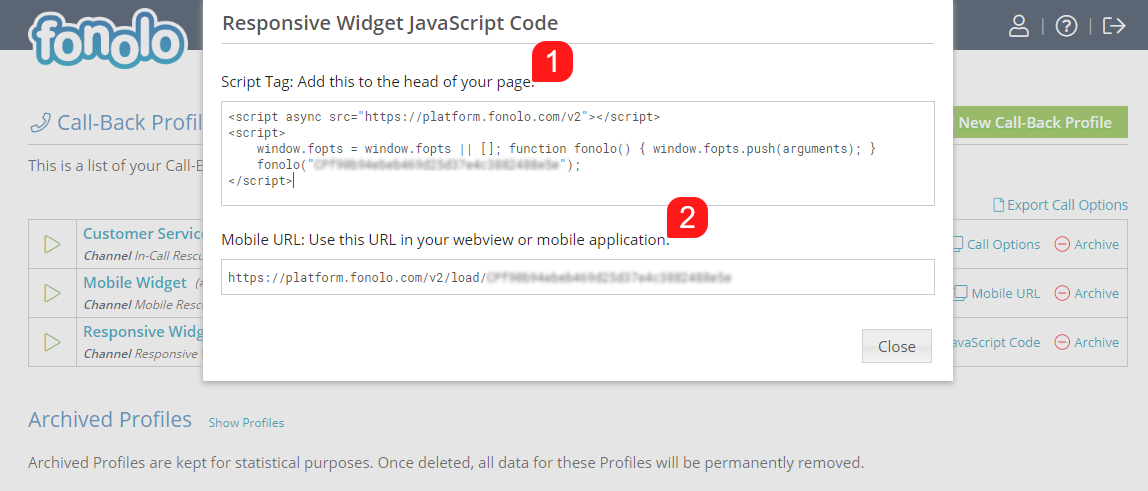
The second option is to use the Mobile URL (2) in either an iframe that is embedded within the web page, or to create a button that triggers a popup with that URL, thereby making the widget popup. Both methods will bring up the same, responsive call-back widget – these two options give you more choices on how you are able to add the widgets to your web pages and mobile apps.