If you work with APIs, you already know why they’re important. If not, feel free to think of them as doors, windows or levers, that make it possible for applications to share data and take actions on another application without requiring developers to share all of their software’s code.
In the case Fonolo’s cloud based call-back solution, The Fonolo API is a simple web service which lets you access objects configured on your Fonolo account, and gives you access to trigger immediate call-backs, and schedule call-backs for the future. Further, you also have the ability to automatically gather call-back statistics to integrate with your own data reporting solution.
To set up API access, it must first be activated by an Admin of your Fonolo Portal. This can be done by following out guide on Creating a New API Application Key.
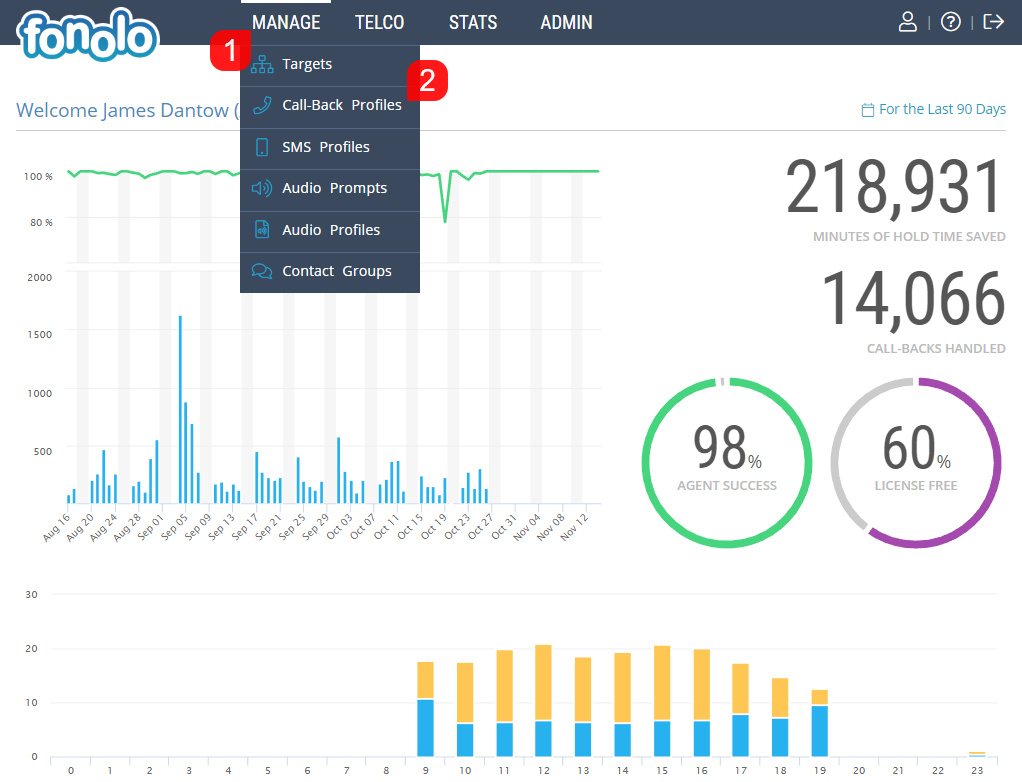
Once the API has been enabled, in order to place, end and schedule call-backs, an API Call-Back Profile must be created. This is done by going to MANAGE (1) > Call-Back Profiles (2).
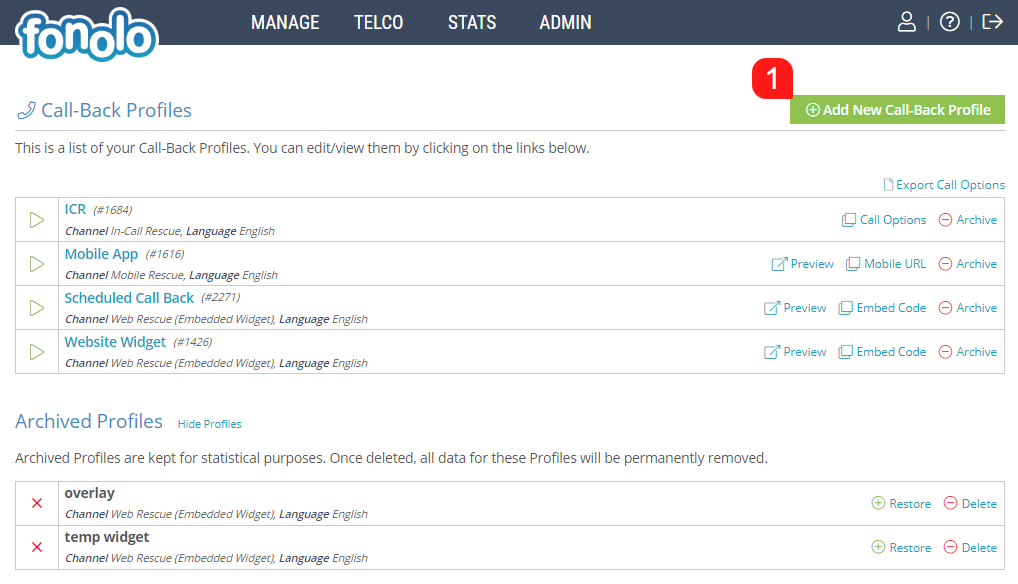
Then click on the green Add New Profile button (1) in the top right hand corner of the page.
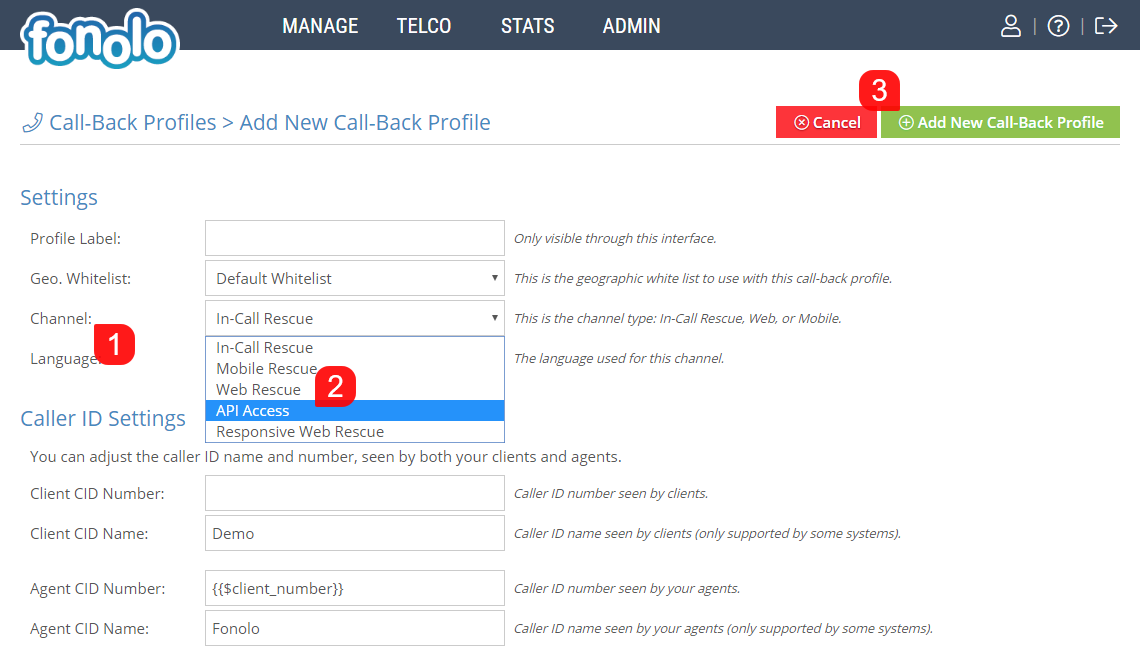
In order to generate the Call-Back Profile, you will first need to decide on some basic parameters. First, click on ‘Channel’ (1) and then select API Access (2) as the Call-Back Profile Type. Enter in additional information, including the Profile Label and Caller ID information. Once you click the green ‘Add New Call-Back Profile’ button (3) in the top right corner, you will then be taken to a page with further configurations for setting up the Call-Back Profile.
Settings
- Profile Label – A friendly name for this Call-Back profile for you to recognize it within your Fonolo Portal.
- Geo. Whitelist – A whitelist of countries and regions that Fonolo is allowed to place calls within. This is decided under Admin > Settings > Geographic Permissions. If none are customized, a Default Whitelist will be used.
- Channel – Here you can set which call-back channel this profile will be attached to (In-Call Rescue, Mobile Rescue, or Web Rescue).
- Language – If you provide support channels in multiple languages, you can specify an alternative language here. We currently support English, French and Spanish, but can add additional language if required.
Caller ID Settings
- Client CID Number – This will be the number that appears to the Client when they receive their call-back from Fonolo.
- Client CID Name – This will be the name that the number belongs to that the Client will see when they receive their call-back from Fonolo.
- Agent CID Number – This will be the number that your Agent will see when they answer the placeholder call from Fonolo. The default will be the Client’s callback number.
- Agent CID Name – This will be the Caller ID name that the Agent will see when they answer the placeholder call from Fonolo. The default will be ‘Fonolo’.
If you would like the phone number that the Client entered to receive their call-back on to appear as the Agent CID Number, the Macro {{$client_number}} will fill this in during each call for you automatically. Once all of the settings are correct, click the green ‘Add New Call-Back Profile’ button in the top-right corner of the page.
Once the API Access Call-Back Profile has been generated, you are now ready to connect to the API and make calls. For all information regarding Response Formats, Response Codes and Authentication, please see our API Information page HERE.