The Fonolo Portal is compatible with OneLogin Single Sign-On (SSO) via SAML2 and this guide will walk you through the implementation steps.
Add Fonolo as an App
- Log in to OneLogin as an Administrator.
- On the OneLogin home page, go to Applications.
- Select Add App.
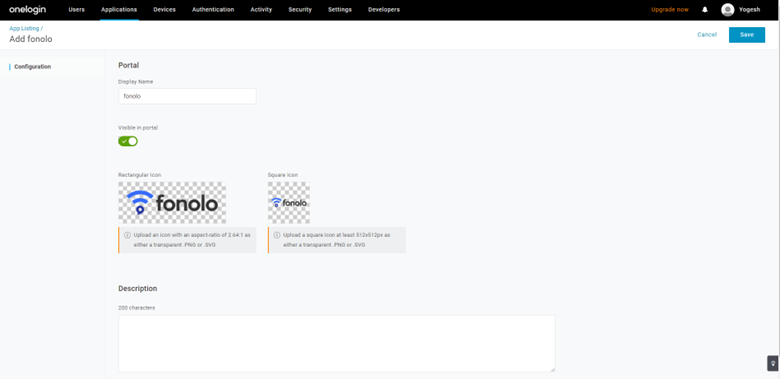
- In the search bar at the top of the page, search for and then select Fonolo. This connector is used to establish the SSO connection to Fonolo.
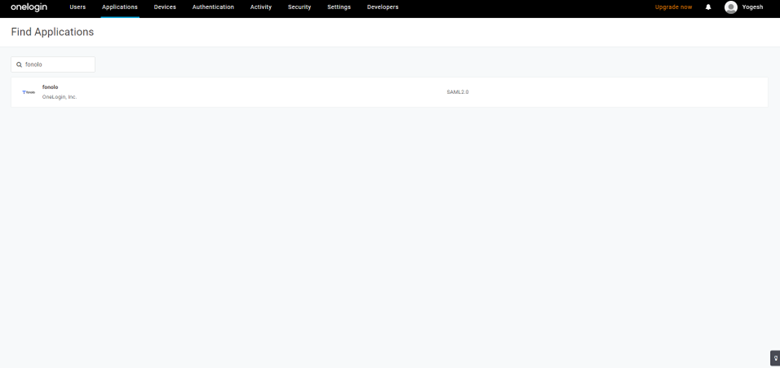
- Save and then go to the SSO tab to continue.
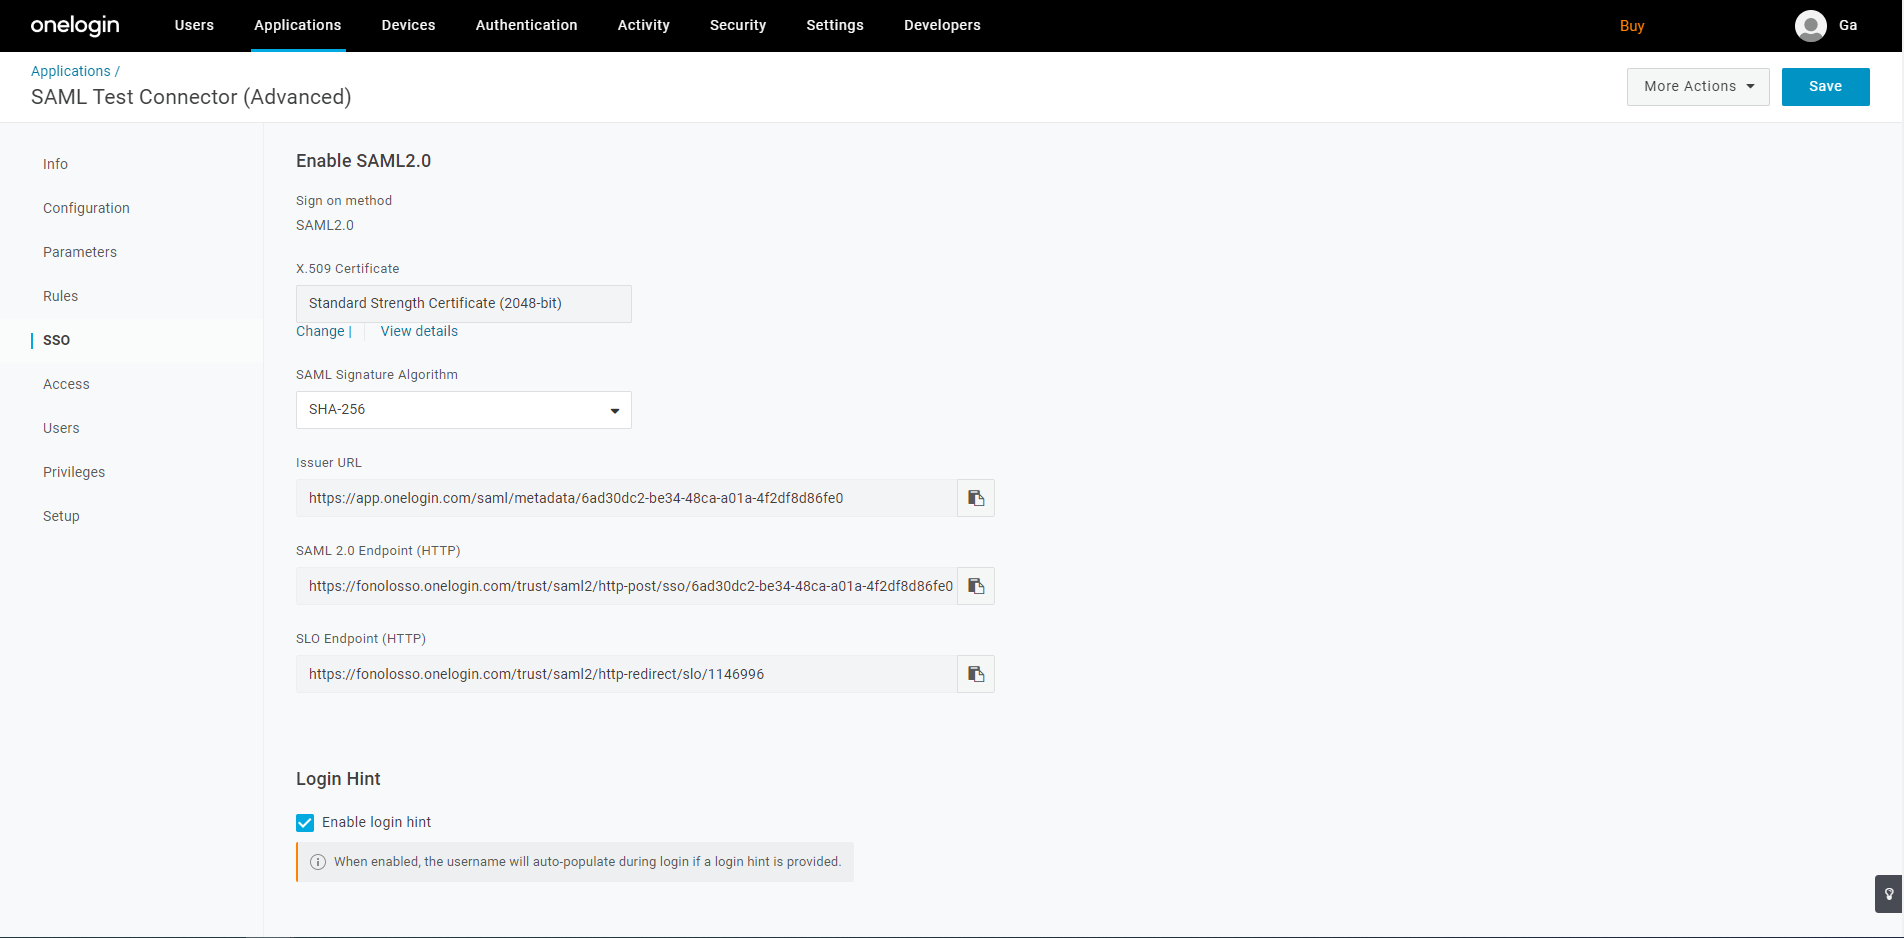
SSO Tab
- Make sure that X.509 Certificate is set to Standard Strength Certificate (2048-bit).
- Make sure that the SAML Signature Algorithm is set to SHA-256.
- Copy the Issuer URL and the SAML 2.0 Endpoint (HTTPS) to a safe place for use later in setting up SSO in the Fonolo Portal.
Add Users to the App
Now that the Fonolo App has been created, you must add OneLogin users so that your team members can have SSO access to the Fonolo Portal.
- On the OneLogin home page, go to Users > Users (1).

- Select the User to be given SSO access.
- Go to the Applications tab for the user.
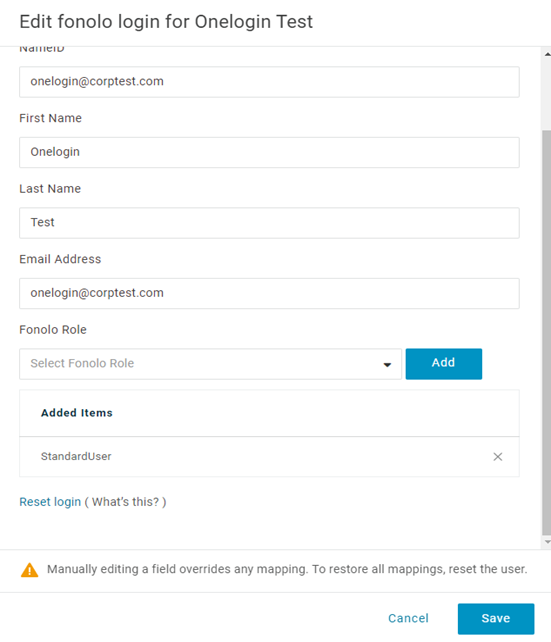
- Select Add Application and select the Fonolo App. The Edit Login dialog opens.
- In the Fonolo Role field, select one of the following roles, depending on the level of access the user needs and then select Add:
- StatsUser
- StandardUser
- AccountManager
Go to Account Role Types for more information on roles and their permissions.
- Make sure that the role you selected shows under the Added Items section and then select Save.

Download the Certificate
Next, you must download the OneLogin IdP Certificate.
- On the OneLogin home page, go to Security > Certificates.
- Select Standard Strength Certificate (2048-bit). The settings dialog for the certificate opens.
- Make sure that the certificate is configured with SHA256 as the SHA Fingerprint and has an X.509 PEM formatted RSA Certificate.
- Save your changes, and then Download the certificate to a safe place for use later in setting up SSO in the Fonolo Portal.
Set Up the Fonolo Portal
Next, you must configure the Fonolo Portal for SSO.
- Log in to the Fonolo Portal as a user with the Account Manager role.
- Go to Admin > Settings > Security > Single Sign-On.

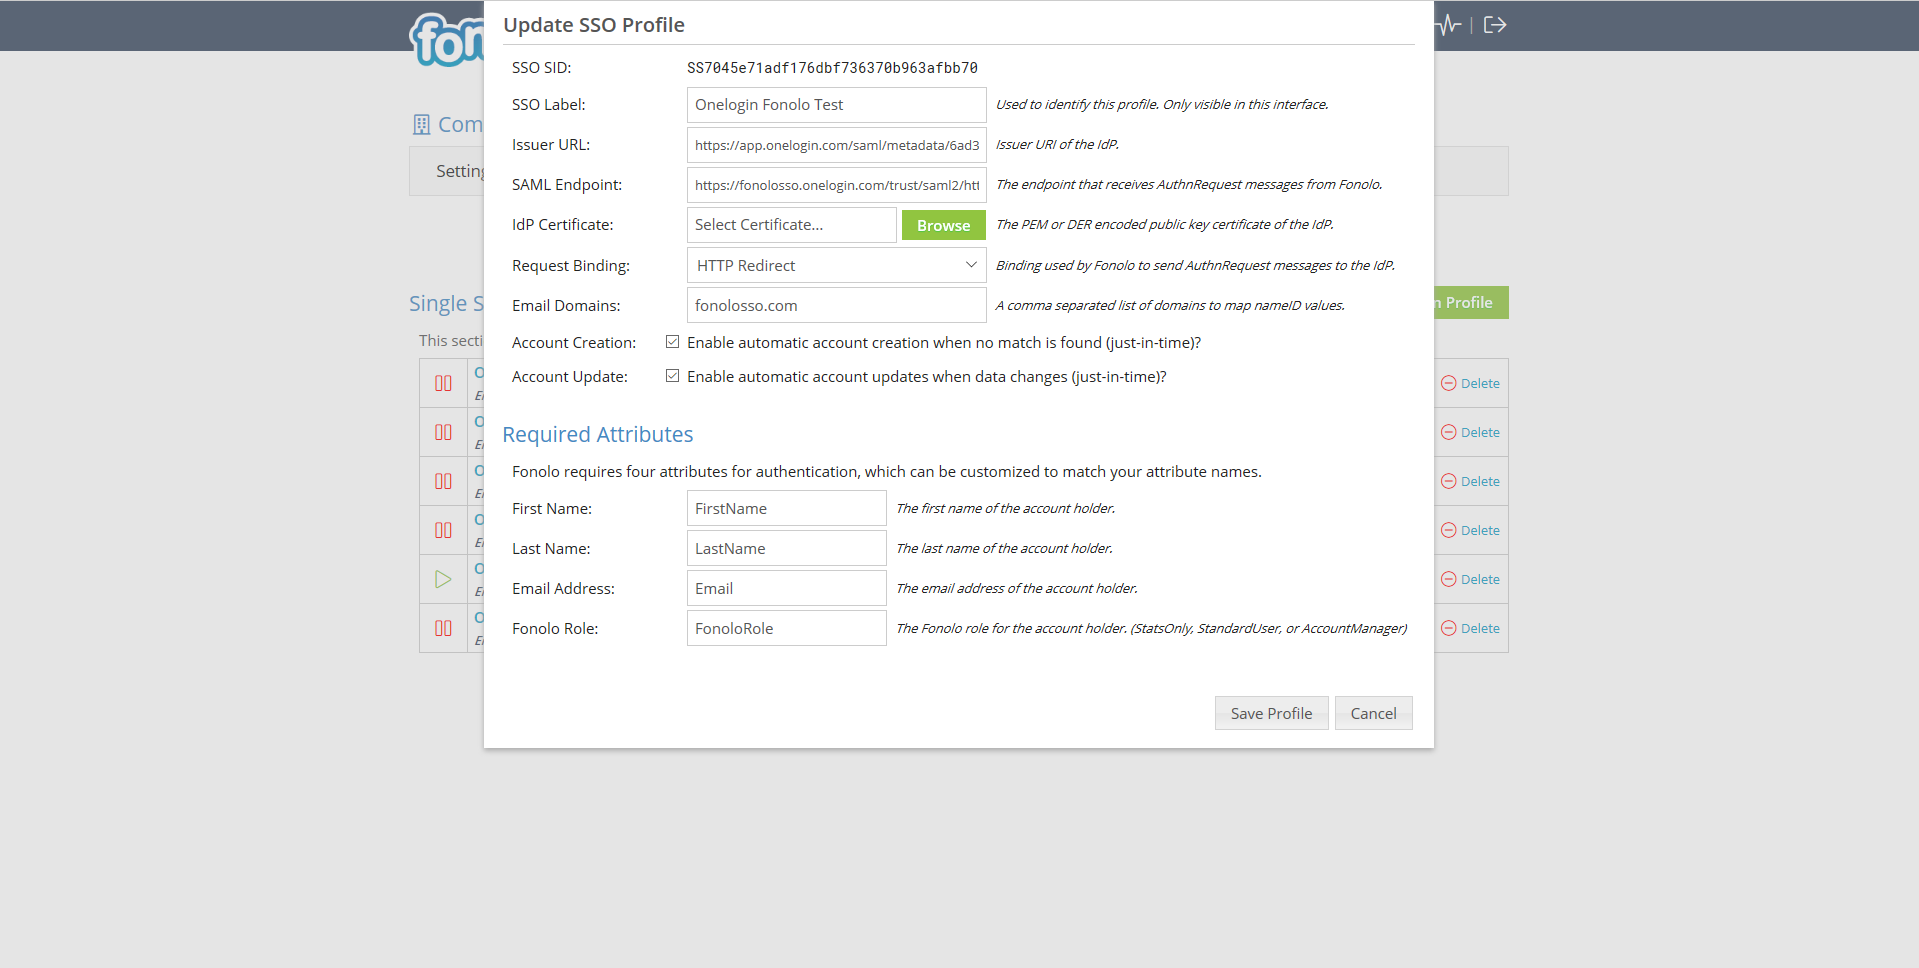
- Select Add Single Sign-On Profile. The Update SSO Profile dialog opens.
- Set up the SSO Profile:
- Enter a name for the SSO Profile in SSO Label. This name will be used within the Fonolo Portal.
- Paste the Issuer URL that was saved in the OneLogin Portal into Issuer URL.
- Paste the SAML 2.0 Endpoint (HTTPS) that was saved into SAML Endpoint.
- Select Browse next to the IdP Certificate field and select the X.509 Certificate that was downloaded. The certificate uploads and processes automatically.
- In Request Binding, select HTTP Redirect.
- In Email Domains, enter the domains of the corporate email addresses your users will use to sign in. Do not enter webmail domains (gmail, hotmail, yahoo, etc.).
- Make sure that the Account Creation and Account Update check boxes are selected. This lets you generate and update Fonolo Portal user accounts during SSO login.
- Select Save Profile. The SSO setup is now complete.
Test the Login
To test out the new SSO connectivity:
- Log in as a new user in the OneLogin Portal that you have added the Fonolo app to.
- Select the Fonolo Portal Login app. The Fonolo Portal opens, with the user logged in with the role given in the OneLogin Portal.